

Hello Everyone, let's understand what is Git and GitHub and what is meant by the Version Control System. Also, let us go through the steps to create a GitHub repository
What is Git?
Git is a very popular version control system. It is installed and maintained in our local system(rather than in the cloud) and gives you a self-contained record of your ongoing programming and can be used completely exclusive of any cloud hosting service. You don't need even internet access except to download it.
Compared to other version control systems Git is responsive, free, and easy to use.
What is a Version Control System and why is it important?
Version Control System is a category of software tools that helps in recording the changes made to files, by keeping a track of modification done in the code.
A software program is developed in collaboration with a group of developers. They might be located at different locations, and they contribute to the product with specific kinds of functionalities by modifying the source code. A version control system is important as it helps the developer team efficiently communicate and track all the changes made to the sources code along with information such as who made and what changes have been made.
What is GitHub?
It is an online database that allows you to keep track of and share your Git version control projects outside of your local systems. GitHub is designed as a Git repository hosting service. GitHub is cloud-based. While Git is a version control system that lets you manage and keep track of your source code history, GitHub is a cloud-based hosting service that lets you manage Git repositories.
Create a GitHub Repo
To push your project up, you will need a repository for it to live in. You can use repositories to collaborate with others and track your work.
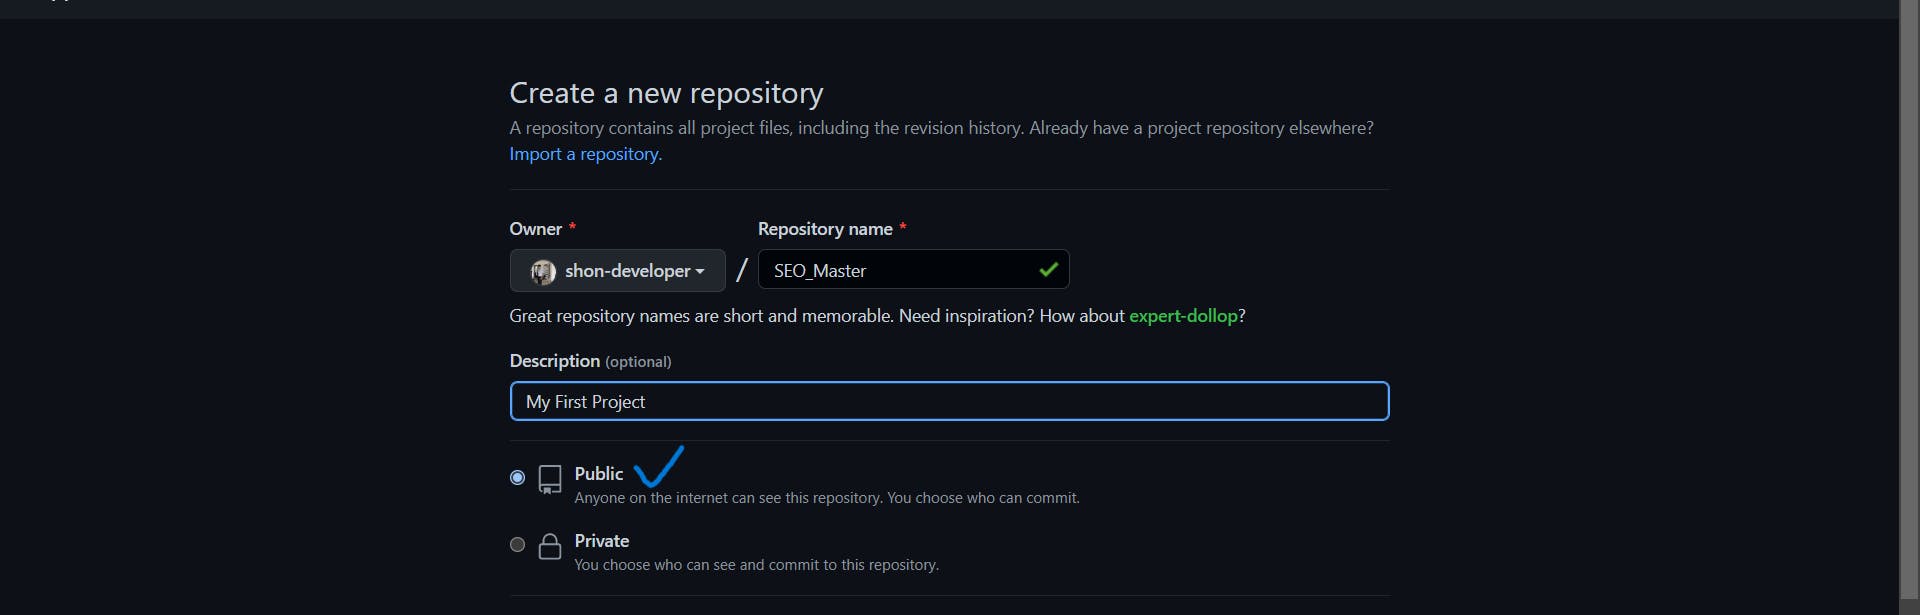
Let's go through the steps to create a new repository
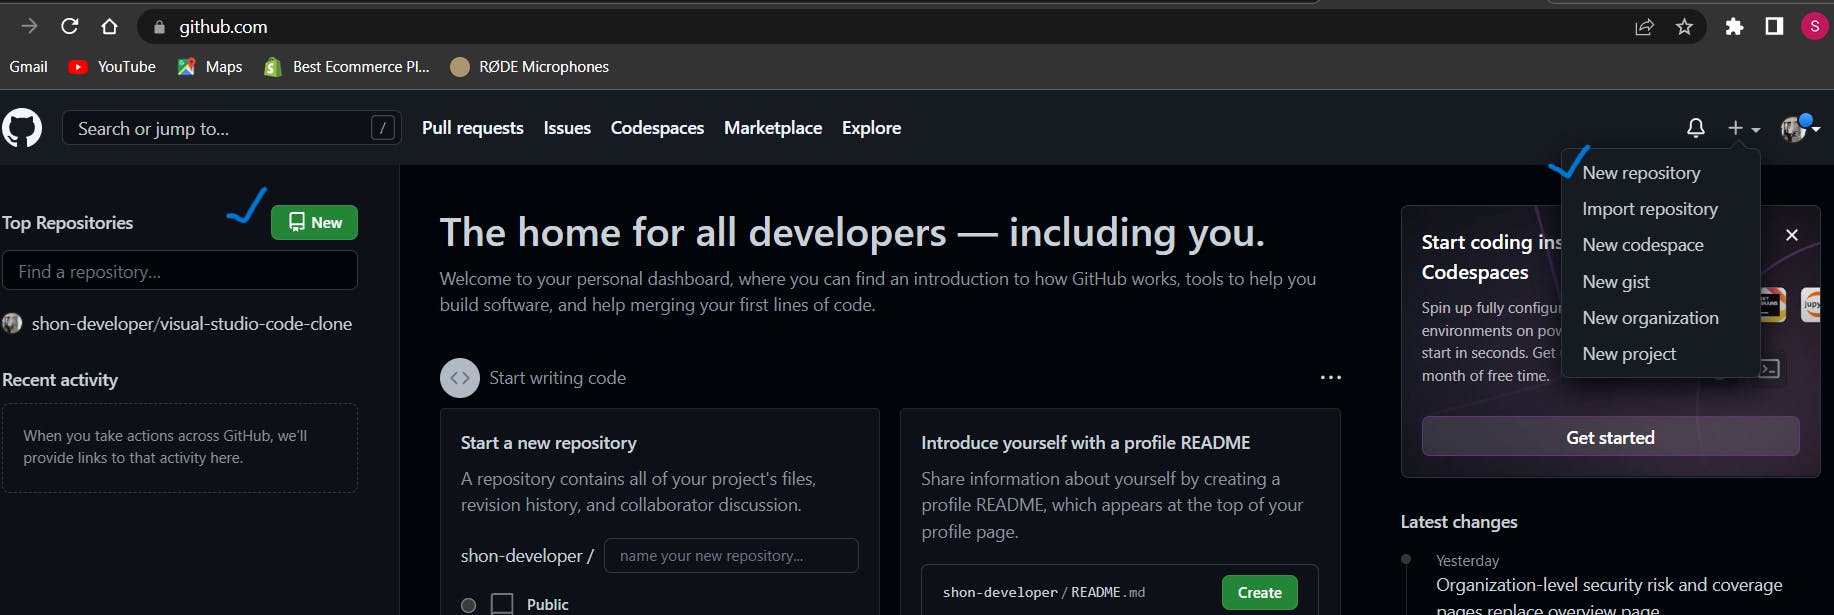
- Sign in to GitHub. In the upper-right corner, use the
+drop-downmenu, and select New repository. Or click on theNewbutton on the left.
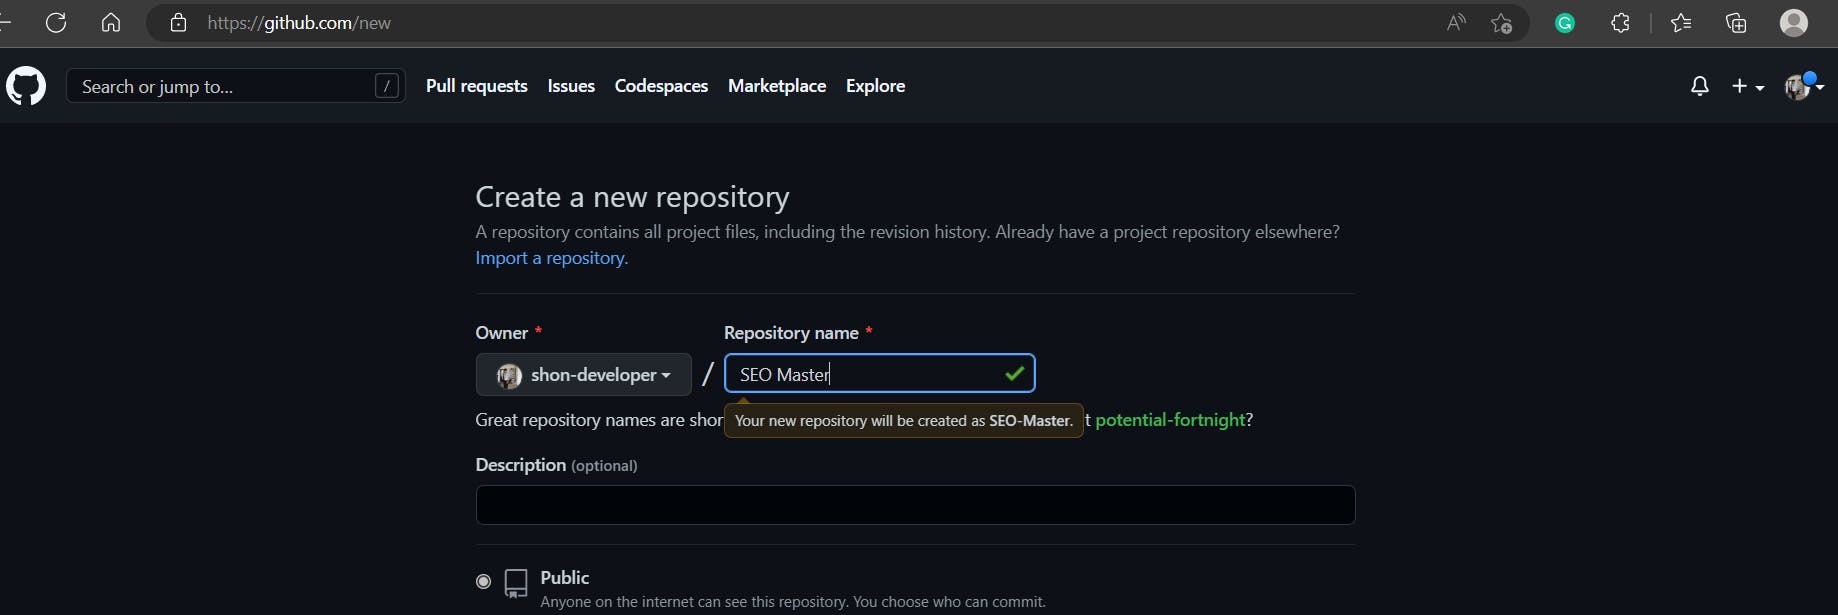
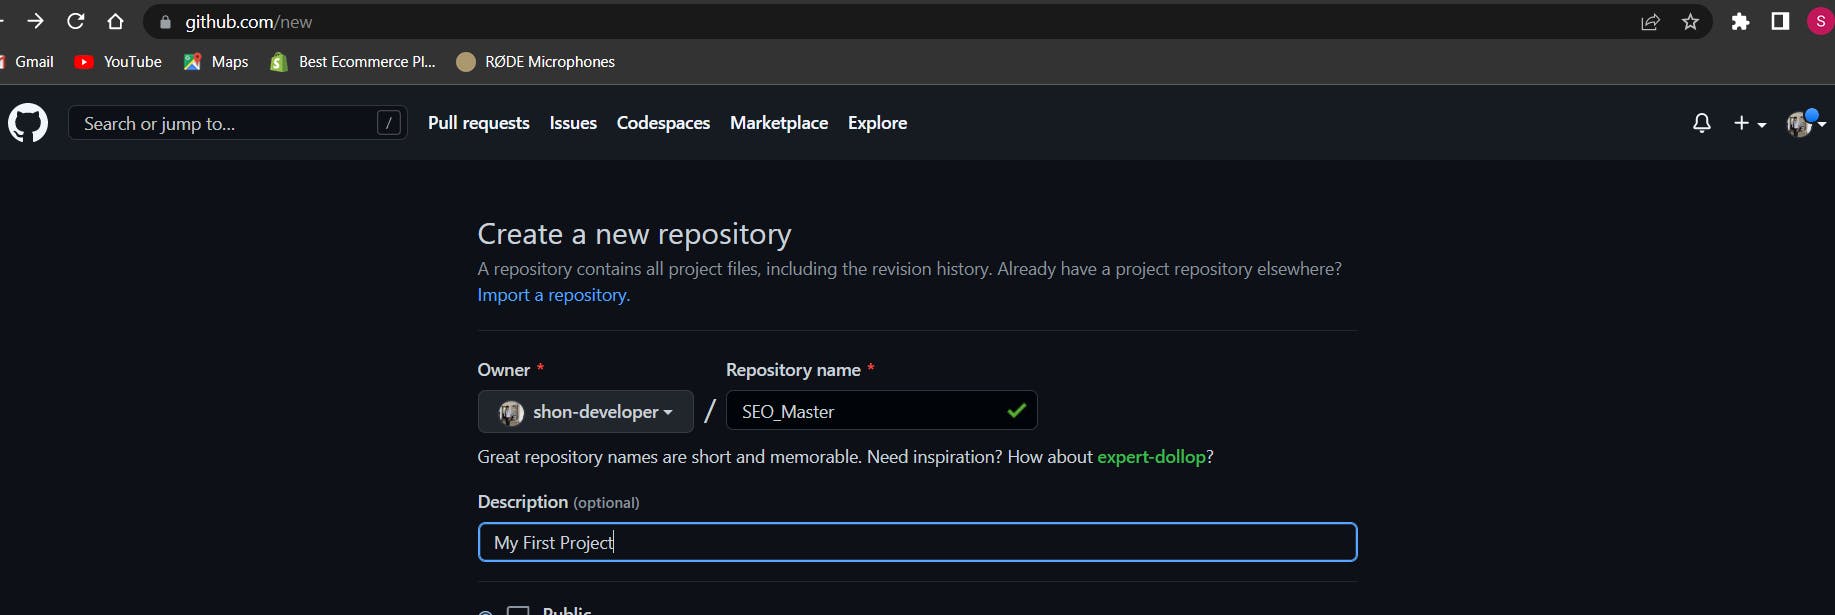
- Then enter the name of your repository
- Optionally, add a description of your repository.
- Choose visibility for your repository, Public or Private.
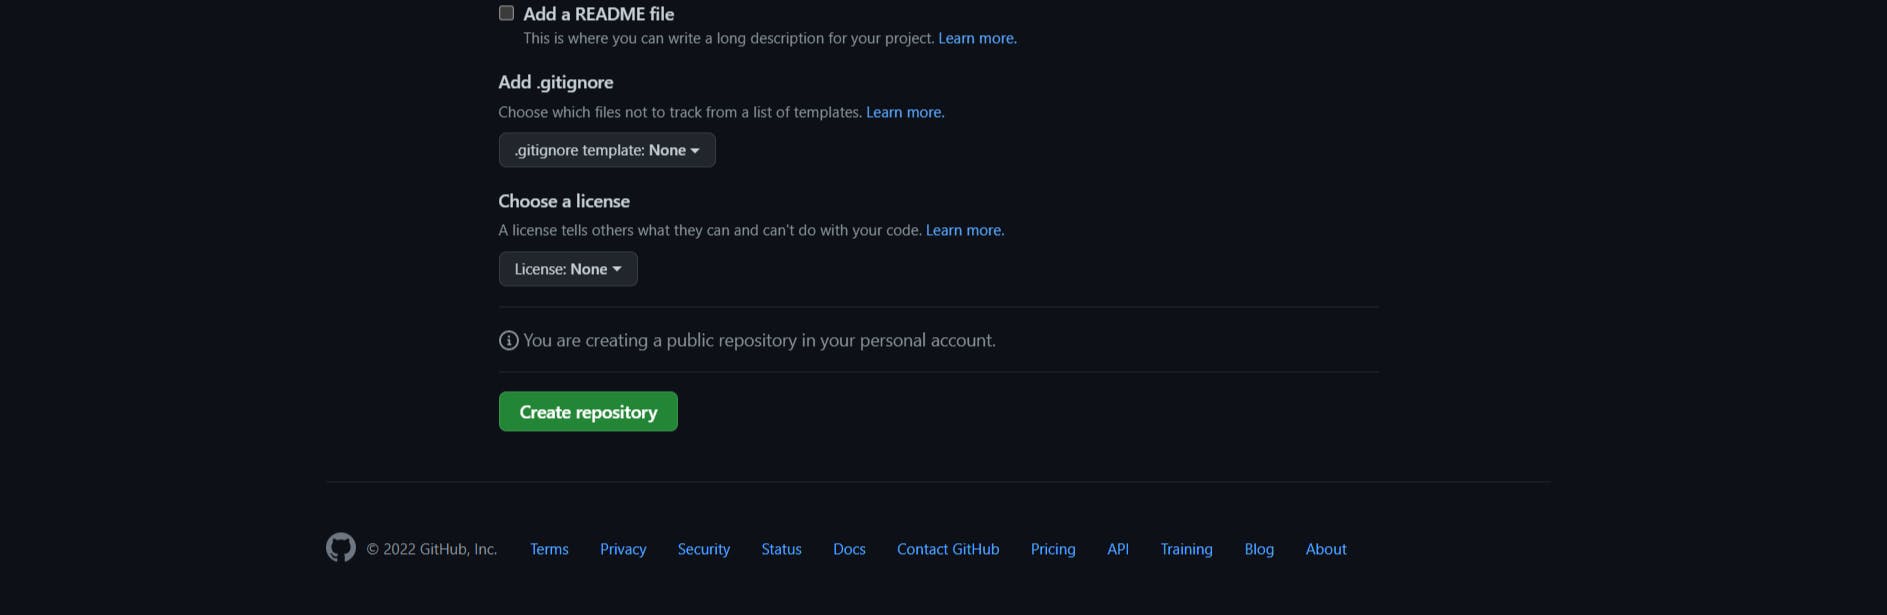
- Click on
Create repositorybutton
This will lead you to the following page. The first thing you will see is echo. This is nothing but a way of creating a demo file and pushing all the code into the readme.md file.
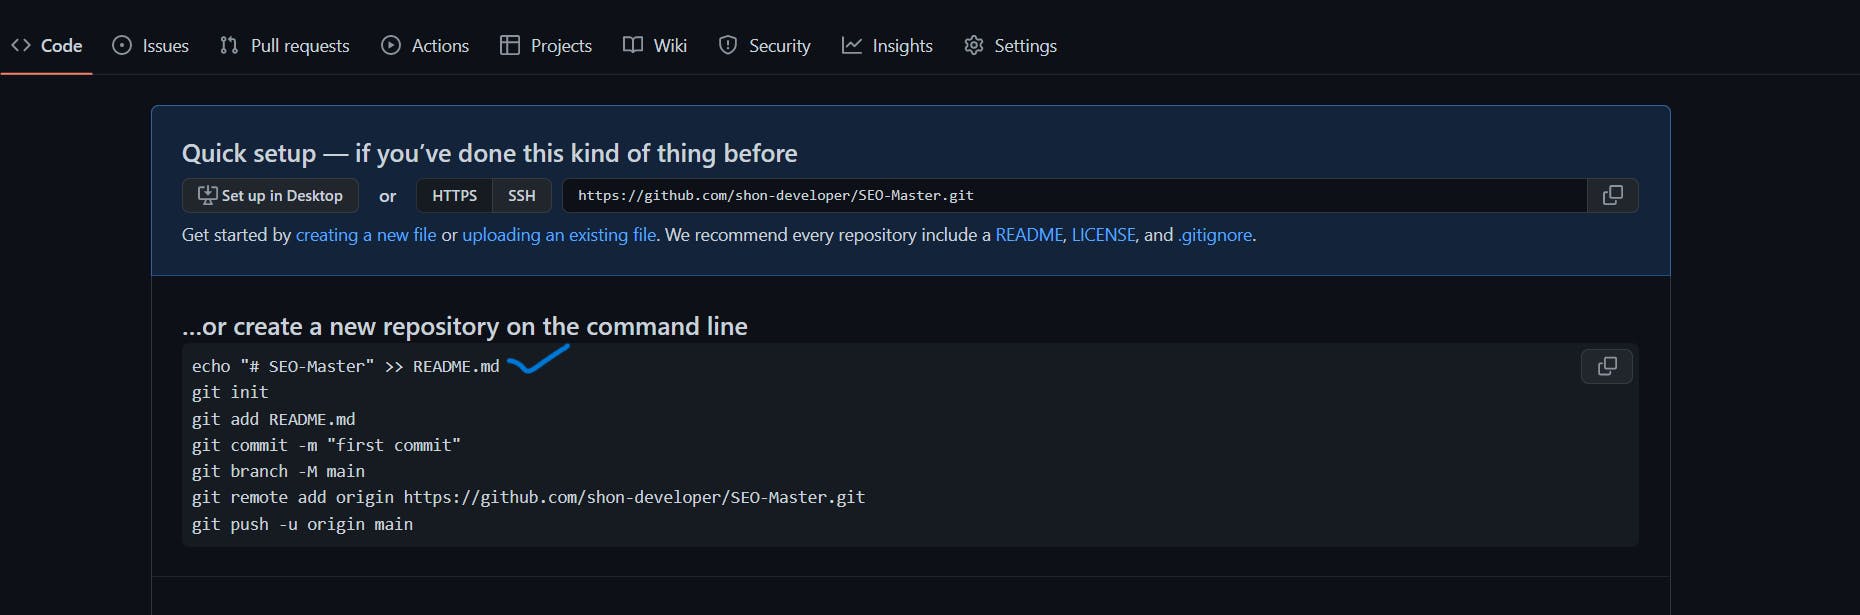
git init: is the first important step. it creates an empty repository or reinitializes an existing one.
git add .: the dot says to add all the files inside the folders. Before running the commit command, git add is used to add any new or modified files.
git status: The git status command tells the current state of the repository. It shows if there are any files that need commitment.
git commit -m " first commit": the -m is very important. It indicates the code editor we use. If you missed -m, it opens up an editor for you.
git branch -M main: The git branch command is used to determine what branch the local repository is on. The command enables adding and deleting a branch.
The next line - git remote add origin https://github.com/Shon-developer/SEO-Master.git: this is where you have to push all the code and pull all the updated code.
git push: is used to transfer the commits or pushing the content from the local repository to the remote repository.
git config: You can change the name that is associated with your Git commits using the git config command.
To set your Git user name for every repository on your computer, open git bash and run git config command with the --global option
$git config --global user.name "your name"
// $git config --global user.name "shon"
And to set your email address for every repository on your system, run the following command.
$git config --global user.email "your email"
// $git config --global user.email "shon@example.com"